Tuesday, 20 December 2011

Rob Ryan Paper Cutter In Action


I saw this video on the 'Meet Me At Mikes Blog' and thought how appropriate to share it here, as I just mentioned him last week.  I really, really love his work!  I also love seeing people's studios and how they work (I always loved that old TV programme 'Through the Keyhole' ).  
Happy viewing!

Sunday, 11 December 2011

Art Club

I am super excited about a new project called ART CLUB! 

One night in November around a kitchen table (and after a few red wines) I was talking to a new friend Brenna about how I'm always more creative when I have a project and sometimes a deadline to work to.  She felt the same way and I mentioned that my partner and myself used to set each other monthly creative projects, back when we lived in Glasgow, Scotland.  With only the 2 of us, my partner and I were always distracted with other things like work, commitments, bad televeision and lots of the other things in life that soak up time.  This montlly project fell away but I always loved this idea of having a project to work towards.  

Looking around the table on this November gathering, I was amazed at how many creative people were there that night: singer/songwriters, photographers, graphic artists and a trained sculptor.  After lots of excited discussion the group at the table all said they felt the same and we decided to set a monthly creative project.  Art Club was born there and then!

For the first monthly project the task was to do something with a piece of A4 paper (any colour).   

The idea is that everyone creates something relating to the theme and interperates it in their own unique way.  A new theme is posted each month then at the end of the month we share what we have created.  You don't need to stick to you normal field of creativity, for example if you are normally a painter you might want to make a short animation, or if you are normally a photographer you might enjoy writing a poem, and so on.

It's really simple, free and hopefully fun for everyone involved! No one will tell you off if you miss a month...I promise.

I think the project should be open to anyone that's interested, all around the world - so please spread the word , the more the merrier!

************************
  This is my Art Club submission this month, and I decided to make a paper cut.  I spent a bit of time living in China in 2006 and I have been obsessed with paper cuts ever since.  I also adore the work of Rob Ryan!

I used navy blue card to cut out, which was a good weight to use, as it didn't rip too easily.  I didn't have any of the official paper cutting scissors that they use in traditional Chinese cuts, I just used a craft knife.

I am really happy with the end result, and I know that I wouldn't have made a paper cut if it weren't for Art Club, so that makes me even happier!  


This is my initial drawing (so technically I used 2 pieces of A4 paper to make the paper cut, but hey, I won't tell if you don't). 

I have 2 books on traditional folk patterns from Russia and Eastern Europe, which I looked through for inspiration.  I then drew out my design on the paper and went over it in black marker.  This part is important as it is easy to get confused with what bits you need to cut.  I cut away the white parts of the drawing, which was taped over the top of the blue card. 


Earlier today I got back from spending the weekend at the brilliant and lovely Meredith Music Festival! I love festivals, and one of the best things is hearing new music.  There was lots to listen to but my favourite were these 3 artists.....

Abbe May....
...and Adelita....

...and Kurt Vile and The Violators....

Rock on!


Monday, 14 November 2011

Barbara Hanrahan

I've recently came across the beautiful prints of Australian artist, Barbara Hanrahan. 

I love her style and use of lino, but most of all I find it very inspiring to learn that she was a teacher who studied printmaking at evening courses.  Being a teacher myself, I always feel a lack of time to make my own work after a busy day of teaching, and I am constantly wishing I had more time to myself to create.  I have recently completed a short evening course in lino cutting, and these classes were definitely the highlight of my week.

I thought I would share some of her beautiful artworks here....


Thursday, 10 November 2011

Silk Cut Lino Workshops


Last night was the last lesson in a 4 week intermediate lino course at the wonderful Silk Cut workshop in Highett, Melbourne.  I have had a brilliant time and have loved learning new techniques and little tricks for the process. Up until now I've been teaching lino cutting in schools and just fumbling my way through, but I decided I wanted to advanced my skills a bit further and found this course.  I can't recommend it enough.  The tutor, Bridget Hillebrand was full of useful tips and very patient with all the questions I asked. 
I am so inspired to make more lino at the moment, so watch this space!

I thought I'd share some of the things I have made. 
We made a reduction print with 3 colours, using one piece of lino. 
I started the process by working out what colours I wanted on a photocopy of my original drawing.  I decided on this drawing of a teapot that I had done.  I t really helped to colour-in the drawing so that each printed layer was clear in my mind...

This is the final print that was acheived over 3 lessons. 
There are 3 prints on top of each other with layer one being grey, layer 2 being blue and the layer 3 being black.  I'm thrilled with the end result and a few friends are getting some overdue presents...


This is a little tester that I made, simply by skipping the blue layer...and I like this too.  I really love the grey colour on the white and am thinking I might do some more printing with just grey, because it's just so pretty!


I did a couple of mini prints for the last week of the course and loved doing these.  This is a banksia seed pod that I sketched then translated into a lino print...

This is the line drawing that I made before cutting the lino...


This is it printed on a water colour wash...

Bridget showed me this technique last night, which is simply acheived by rolling the lino through twice without re-inking.  I love the ghostly grey colour acheived....


This is a little owl I did too and the lino block that I carved out... 

Just black on white...

And a 3rd rolling of the lino (without re-inking) on a water colour wash.


And this is my makeshift drying space.  I rather like laying out all my prints and looking at them...

Tuesday, 4 October 2011

Lana Del Rey


I love this song, and the video is pretty good too.  Here is the beautiful girl who sings it...she describes herself as "gangster Nancy Sinatra", but I think she's selling herself short.  She's my new girl crush for sure!


Sunday, 2 October 2011

A little summery song...

Man Bunting (munting!)

My man turned 30 last week and I wanted to make some decorations for his party that weren't too twee or too girly.  I ended up going for 'Man Bunting' or 'Munting' as it has become known in the family. 
I used his old clothes - t-shirts, shirts, old boxers (washed of course!) and hankies (again, washed of course!).  I love that the bunting is made out of his old clothes as it's really personal to him.  I also think it is  pretty funny that his old undies are strung up and looking pretty.  It was also a lot cheaper than buying material from a shop.

Here are the old pile of clothes ready for cutting....

 To begin with I made a cardboard triangle template - it measured 19cm across the top and was an equilateral triangle, with both sloping edges measuring 27cm.  Your own bunting can be any size of course.  I cut the triangles with pinking shears, as this meant I didn't have to tidy up any of the edges of the triangles - no frays.  But, if i'm honest, the whole bunting isn't exactly neat and tidy.  I figure it can't really be seen in great detail when it's hung up, and also the messy factor adds to the manly feel. 

After I had cut out all the triangles I arranged them in a line along the length of the cotton ribbon.  I bought this cotton ribbon from a craft shop which i just folded over and pinned, ready for sewing on the machine...
i had some help with the pinning from the birthday boy...

I used a zig-zag stitch to sew the triangles on, a nice little snazzy touch!

And here is the end result hanging up in the house....


(i  wanted to have a photo from the party, but i enjoyed myself a little too much that night, and with all the merriment I forgot to take a photo!)  
I'm really delighted with the end result.  Bunting makes everything a little nicer in my opinion.  I'm also happy that I have bunting in the cupboard now - ready for any occasion.

I got really into the idea of bunting when I was making the 'munting' and thought about using net curtains for a pretty girlie bunting, or some paper bunting with some old books/maps/newspaper.  The possibilities are endless!
Here are some nice bunting ideas....


and a nice little drawing that could be an invite to a party... 

Pigeon x

Lemons, lemons everywhere!

I was amazed when I saw this basket of gigantic lemons on the porch of Karen & Phil's house - they are most definitely the biggest I have ever seen!  Even better still, these babies come from the lemon tree in the back garden!  Coming from freezing cold Scotland, I have never come across so many lemon trees in people's back gardens.  Walking around the suburbs of Melbourne it seems like nearly everyone has a lemon tree with fantastic lemons - how lucky!  One charity shop I went into last week there was even a basket of free lemons - they are in abundance at the moment.  I thought I should make something 'lemony' with these guys so I thought about what I'd like to eat and that was cupcakes!  I got the recipe from BBC Good Food website for Lemon and Poppyseed Cupcakes...delicious in my opinion!  I found that the icing was more than enough for one batch of 12 cakes, and in the end I made 24 cupcakes, the icing was more than enough. 

Here are my cakes, looking all delicious....

Wednesday, 28 September 2011

Baking Bread with Rowan

Last week my good friend Rowan came around to teach me how to make bread.  I'll soon be 30 and I decided it was about time that I gave it a shot.  Rowan is so much fun to hang out with, and he's also a great cook...friend with benefits!  He also made a brilliant bread making soundtrack CD...I have a lot of love for this guy just now!  All in all it was a really fun day.
There isn't much to it...flour, yeast and water.

This bit was quite tough and a full upper body work out!  I mostly watched this bit and Rowan worked his magic.

Pre-oven.

Post oven and looking good!  YUM!

I made soup to go along with the delicious bread.  Tasty, tasty, tasty!!!

Hello new life in Australia!

I recently moved to Melbourne with my husband, FOR GOOD! We met 5 years ago on a drunken and magical night out in the city, and since then Melbourne has always felt like home.  I love Melbourne!  I really, really, love Melbourne!  We've travelled and lived in lots of different places but Melbourne has always felt like the happiest place for both of us.  We've talked so often of our favourite people, places and memories, so it feels just fantastic to finally be here.

So here we are - a new life, a new start, new beginnings.  On the lead up to our move here I've been thinking of all the things I want to do in my new life, and thinking of how I can be the 'ultimate me'; like being more creative, making my own work more, baking, cooking, exercising more (cough, cough, actually doing exercise) saying yes to new experiences, not being afraid of new people, being nicer, reading more, doing new hobbies, volunteering and making more time for people I care about - to name just a few!

Writing a blog is on my list of things I wanted to do in my new Australian life, so here it is...my first post and a new beginning!

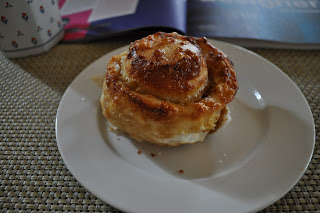
Cheers to Melbourne, to the better me and to new beginnings! Oh and also cheers to Cheesymite Scrolls...they are so good!!!!

Pigeon x